
Introduction
Flutter GoRouter is a lightweight and powerful routing library for Flutter applications. It provides a simple and declarative API for defining routes and managing navigation within your app. With GoRouter, you can easily handle complex routing scenarios, including deep linking, route guards, and passing parameters between screens.
Key Features
- Declarative Routing: GoRouter allows you to define routes using a simple and intuitive syntax. You can specify route paths and corresponding builders to create your app’s navigation structure.
- Route Guards: GoRouter supports route guards, allowing you to control access to specific routes based on conditions such as user authentication or app state.
- Parameter Passing: With GoRouter, you can pass parameters between screens effortlessly, making it easy to transfer data and maintain state throughout your app.
- Deep Linking: GoRouter provides built-in support for deep linking, allowing your app to respond to external URLs and navigate to the appropriate screens.
- Integration with Flutter Navigation: GoRouter seamlessly integrates with Flutter’s navigation system, ensuring compatibility with existing navigation patterns and widgets.
Why Choose Flutter GoRouter?
- Simplicity: GoRouter offers a clean and straightforward API, making it easy to understand and use, even for beginners.
- Flexibility: GoRouter provides the flexibility to handle a wide range of routing scenarios, from simple navigation flows to more complex app architectures.
- Performance: GoRouter is designed to be lightweight and efficient, minimizing overhead and ensuring smooth navigation transitions.
Comparing Flutter Routing Methods: go_router vs. Others
When it comes to routing in Flutter, developers have several options to choose from. Let’s compare go_router with some other popular routing methods:
| Routing Method | Pros | Cons |
|---|---|---|
| Navigator Class | - Built-in Flutter class for managing routes. - Simple to use, especially for basic navigation needs. - Widely supported and documented. |
- Limited flexibility for more complex navigation patterns. - Can become verbose and hard to maintain in large apps. - Doesn’t provide built-in support for deep linking or route guards. |
| Named Routes | - Allows developers to define routes with unique names. - Simplifies navigation management by abstracting route names from their implementation. - Provides a clear and structured way to organize routes. |
- Requires manual navigation management and boilerplate code. - Can become cumbersome to maintain as the app grows. - Doesn’t offer built-in support for advanced features like route guards. |
| Fluro | - Offers powerful routing capabilities with support for route parameters and transitions. - Allows for deep linking and route guards. - Provides a clean API for defining routes and handling navigation. |
- Requires additional setup and configuration compared to built-in Flutter routing. - May introduce a learning curve for developers new to the package. - Limited community support and documentation compared to official Flutter routing solutions. |
| GoRouter | - Provides a simple and declarative API for defining routes. - Offers built-in support for features like route guards, deep linking, and route parameters. - Integrates seamlessly with Flutter’s navigation system. - Well-documented with good community support. |
- Requires adding a dependency to your project. - Might introduce a learning curve for developers unfamiliar with the package. |
While each routing method has its own strengths and weaknesses, go_router stands out for its simplicity, flexibility, and feature set. It strikes a balance between ease of use and powerful functionality, making it a compelling choice for managing navigation in Flutter apps. However, developers should evaluate their specific requirements and preferences before selecting a routing solution for their projects.
Building a Simple Flutter App with GoRouter for Navigation
Step 1: Create a New Flutter App
First, we need to create a new Flutter app. Open your terminal or command prompt and run the following commands:
flutter create my_gorouter_app
cd my_gorouter_app
This will create a new Flutter project named my_gorouter_app and navigate into the project directory.
Step 2: Add GoRouter Dependency
Next, we need to add the go_router package to our project. Open the pubspec.yaml file and add go_router under dependencies:
dependencies:
  flutter:
    sdk: flutter
  go_router: ^6.0.0
After adding the dependency, run flutter pub get to fetch the package.
Normally this automatically runs after saving the pubspec.yaml
Step 3 : Update the main.dart file
Insert the following code to your main.dart file.
import 'package:flutter/material.dart';
import 'package:go_router/go_router.dart';

import 'package:app/pages/home_screen.dart';
import 'package:app/pages/second_screen.dart';
import 'package:app/pages/third_screen.dart';

void main() {
  runApp(MyApp());
}

class MyApp extends StatelessWidget {
  final GoRouter _router = GoRouter(
    routes: [
      GoRoute(
        path: '/',
        builder: (context, state) => HomeScreen(),
      ),
      GoRoute(
        path: '/second',
        builder: (context, state) => SecondScreen(),
      ),
      GoRoute(
        path: '/third',
        builder: (context, state) => ThirdScreen(),
      ),
    ],
  );

  @override
  Widget build(BuildContext context) {
    return MaterialApp.router(
      routerDelegate: _router.routerDelegate,
      routeInformationParser: _router.routeInformationParser,
      routeInformationProvider: _router.routeInformationProvider,
      title: 'Flutter GoRouter Demo',
    );
  }
}
Step 3 : Add Pages
Add a new folder called pages inside the lib folder.
Then inside that folder add following files.
1 .home_screen.dart
import 'package:flutter/material.dart';
import 'package:go_router/go_router.dart';

class HomeScreen extends StatelessWidget {
  @override
  Widget build(BuildContext context) {
    return Scaffold(
      appBar: AppBar(
        title: Text('Home Screen'),
      ),
      body: Container(
        color: Colors.blue.shade100,
        child: Center(
          child: Column(
            mainAxisAlignment: MainAxisAlignment.center,
            children: [
              ElevatedButton(
                onPressed: () {
                  context.go('/second');
                },
                child: Text('Go to Second Screen'),
              ),
              SizedBox(height: 20), // Space between buttons
              ElevatedButton(
                onPressed: () {
                  context.go('/third');
                },
                child: Text('Go to Third Screen'),
              ),
            ],
          ),
        ),
      ),
    );
  }
}
2 .second_screen.dart
import 'package:flutter/material.dart';
import 'package:go_router/go_router.dart';

class SecondScreen extends StatelessWidget {
  @override
  Widget build(BuildContext context) {
    return Scaffold(
      appBar: AppBar(
        title: Text('Second Screen'),
      ),
      body: Container(
        color: Colors.green.shade100,
        child: Center(
          child: Column(
            mainAxisAlignment: MainAxisAlignment.center,
            children: [
              ElevatedButton(
                onPressed: () {
                  context.go('/');
                },
                child: Text('Go to Home Screen'),
              ),
              SizedBox(height: 20), // Space between buttons
              ElevatedButton(
                onPressed: () {
                  context.go('/third');
                },
                child: Text('Go to Third Screen'),
              ),
            ],
          ),
        ),
      ),
    );
  }
}
3 .third_screen.dart
import 'package:flutter/material.dart';
import 'package:go_router/go_router.dart';

class ThirdScreen extends StatelessWidget {
  @override
  Widget build(BuildContext context) {
    return Scaffold(
      appBar: AppBar(
        title: Text('Third Screen'),
      ),
      body: Container(
        color: Colors.red.shade100,
        child: Center(
          child: Column(
            mainAxisAlignment: MainAxisAlignment.center,
            children: [
              ElevatedButton(
                onPressed: () {
                  context.go('/');
                },
                child: Text('Go to Home Screen'),
              ),
              SizedBox(height: 20), // Space between buttons
              ElevatedButton(
                onPressed: () {
                  context.go('/second');
                },
                child: Text('Go to Second Screen'),
              ),
            ],
          ),
        ),
      ),
    );
  }
}
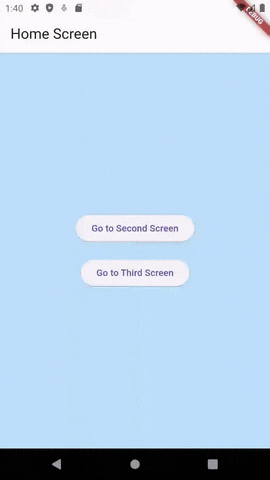
Output
Then run the flutter application using
flutter run
or click Run Without Debbugging option in run tab.
Then the output should be like this.
Conclusion
In this blog post, we explored how to use the go_router package to manage navigation in a Flutter app. We started by creating a new Flutter project and then added the go_router dependency. We set up routing in the main.dart file and created three separate pages: HomeScreen, SecondScreen, and ThirdScreen, each in their own Dart files. To enhance the user interface, we added background colors and spaced out buttons on each screen.
Using go_router, we demonstrated a clean and efficient way to handle routing between multiple screens. This method provides a straightforward approach to managing navigation in your Flutter applications, especially as they grow in complexity.
With go_router, you benefit from:
- Declarative routing that simplifies navigation management.
- Support for advanced features like route guards and deep linking.
- Improved code organization by separating screens into individual files.
This makes go_router a powerful tool for developing robust and scalable Flutter applications. Hope this guide has been helpful in understanding the basics of go_router and how to implement it in your own projects.